Select your preferred way of recording your video based on what equipment you have available. Click on the appropriate image or simply scroll down below.
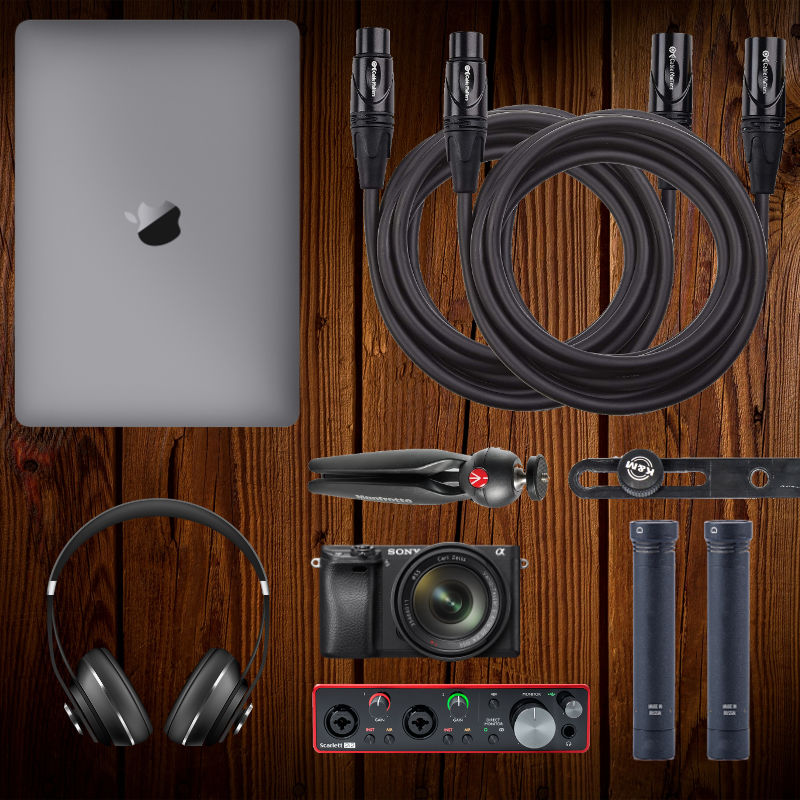
Record With DSLR/Mirrorless Camera, Microphones And Audio Interface (Best)
What you’ll need:
- DSLR or Mirrorless Camera
- Audio Interface
- 2 Condenser Microphones
- 2 XLR Cables
- Microphone Stand
- Stereo microphone bar
- Headphones
- Computer with installed D.A.W.

This option is more for people who have recorded home videos in the past. You’ll want to first place the microphones on the microphone stand(s), connect the mics to the audio interface or portable recorder via two XLR cables and the interface to the computer via the included USB cable.
Open your D.A.W. of choice (I recommend Reaper) and record your performance while playing back the score in VGO App (listening on headphones).
Audio editing is allowed or you may upload your best overall take, however the video should be preferably one-angle only. You may even first record the audio and video later as a playback performance.
Please don’t use any effects such as reverb or compression on your audio, we only need a raw stereo recording.
Synchronize audio and video in Reaper or any video editing software (recommended: Final Cut Pro X, Davinci Resolve, Adobe Premiere) and export your final video.
For some basic information on stereo recording, please check my blog post: How to record classical guitar part 1: Stereo techniques explained
If you’d like to dig deeper into the world of audio editing, here’s some of my tutorials and video demostration of 4-point editing in Reaper:
Editing Classical Music in Reaper Part 1 / Editing Classical Music in Reaper Part 2 / Editing Classical Music in Reaper Part 3 – Source/Destination 3 and 4-point Editing in Reaper (advanced)
Editing Classical Guitar in Reaper (VIDEO)
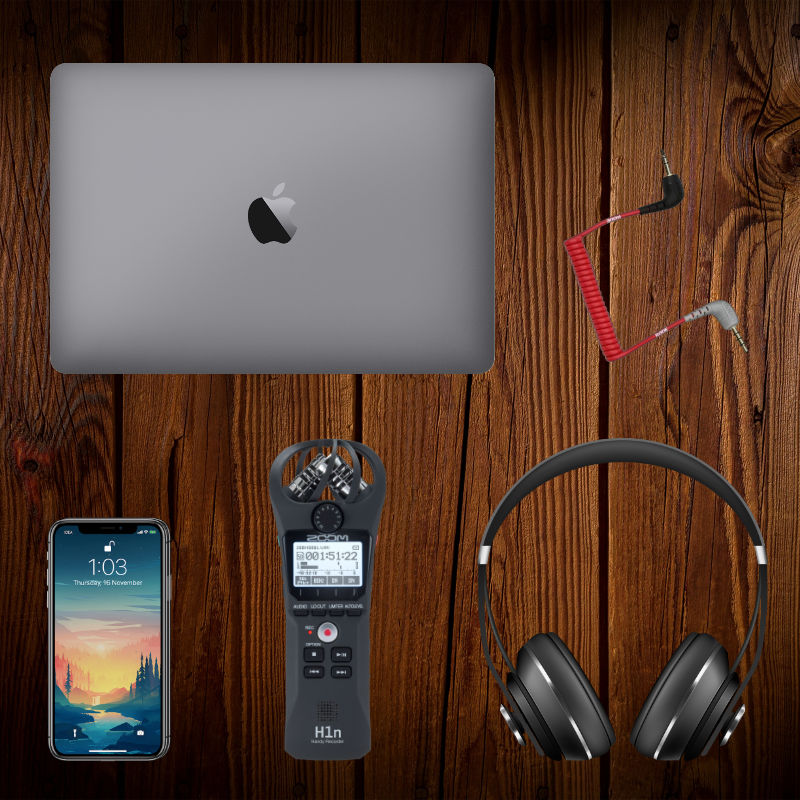
Record With Smartphone And Portable Recorder (Better)
What you’ll need:
- Smartphone
- Portable Audio Recorder
- TRS to TRRS cable (optional)
- Computer
In this scenario you’ll be using your portable recorder (such as Zoom H1n, Zoom H4n, Zoom H5n, Tascam DR-22wl, Tascam DR-44wl etc.) to record sound and the smartphone camera to record video. We’ll connect the two devices via a TRS to TRRS cable unless you know how to synchronize audio and video later. We’ll be using the computer only to display and play back the score with our score player.
1. Prepare Your Audio Devices
Firstly, place the audio recorder on your desk or a mini tripod at an optimal position (40cm away from the guitar pointing at the 12th fret) and power up the device.
Please check that the audio gain is high enough to ensure a good quality recording but not too high so that it causes clipping (distortion).
Secondly, you’ll need to connect the audio recorder to the smartphone using a TRS to TRRS cable. If you skip this step, you’ll need to synchronize audio and video later on your computer.
Finally, please connect your headphones to the computer so you’ll be able to listen to the score player while recording.
Please don’t use any effects such as reverb or compression on your audio, we only need a raw stereo recording.
2. Prepare the Smartphone
Place the smartphone on stable surface (a stack of book or a mini tripod, so that the shot is approx. eye level) and point the camera at you.
Open the Camera App and start experimenting with different framings. The video should clearly show your face (please no cutting the top of the head off) and instrument and, as mentioned above, we prefer eye level shots rather than low camera angles. We recommend shooting video while there is plenty of natural light. Don’t use window as a backlight, position yourself so that the window is in front of you or at a max. 45 degree angle. Use any background you like.
3. Make the Most out of Your Smartphone Video
Please consider watching these short tutorials I made on how to make the best possible video using your smartphone: Making Videos on Your Smartphone (VIDEO) / Making the Most of Smartphone Video (VIDEO)
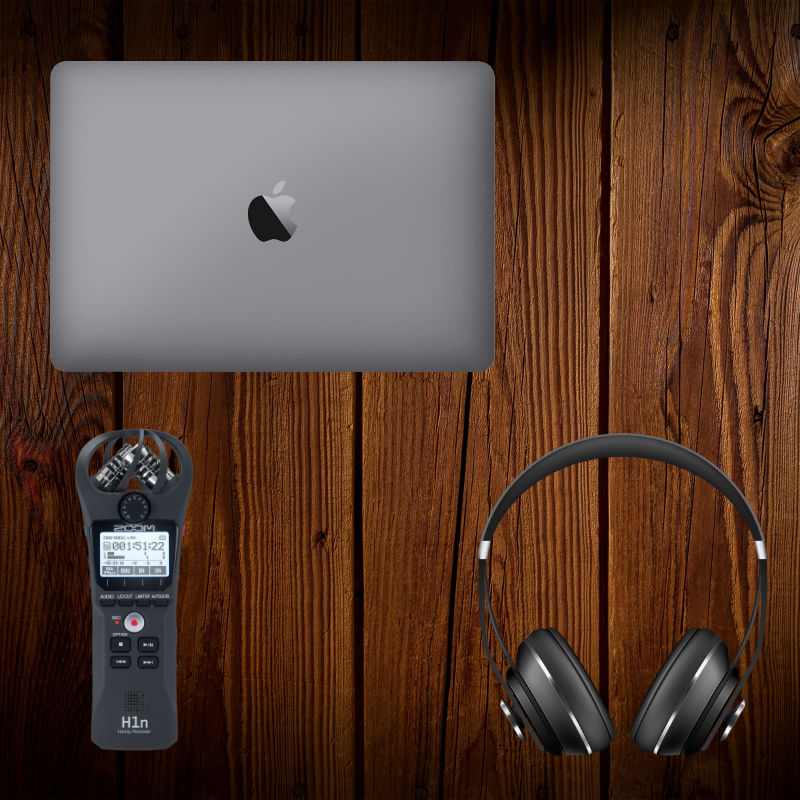
Record With Webcam And Portable Audio Recorder (Good)
What you’ll need:
- External webcam or laptop with built-in camera
- Portable Audio Recorder
- Computer
1. Connect Your Audio Devices
In this scenario you’ll be using your portable recorder (such as Zoom H1n, Zoom H4n, Zoom H5n, Tascam DR-22wl, Tascam DR-44wl etc.) as an audio interface.
Firstly, connect the audio recorder to the computer. Place the recorder on your desk or a mini tripod at an optimal position (40cm away from the guitar pointing at the 12th fret) and power up the device. If you are asked whether you’re using the device as a recorder or audio interface, please select the latter.
Please check that the audio gain is high enough to ensure a good quality recording but not too high so that it causes clipping (distortion).
Secondly, please connect your headphones to the computer so you’ll be able to listen to the score player while recording.
Please don’t use any effects such as reverb or compression on your audio, we only need a raw stereo recording.
2. Prepare the Webcam
If you have an external webcam, place it at eye-level height directly in front of you, so that you can clearly see your face and both hands, and connect to your computer via USB cable.
If you are using your laptops’s built-in webcam, I recommend placing it on a stack of books, so that the camera is at approximately eye-level height. It will be easier to read the score this way and will also look better on camera.
The video should clearly show your face (please no cutting the top of the head off) and instrument and, as mentioned above, we prefer eye level shots rather than low camera angles. We recommend shooting video while there is plenty of natural light. Don’t use window as a backlight, position yourself so that the window is in front of you or at a max. 45 degree angle. Use any background you like.
3. Recording App and Settings
On a Mac: 1. Open QuickTime Player > 2. File – New Movie Recording > 3. Settings Arrow – Select Webcam and Audio Recorder, Maximum Quality.

On Windows: 1. Go to Sound Settings > Record > Select your audio recorder as microphone source – Set Default > IMPORTANT: In this menu you’ll need to disable all the other microphones (internal mic, webcam mic) for the camera app to work properly. > Open Camera App.
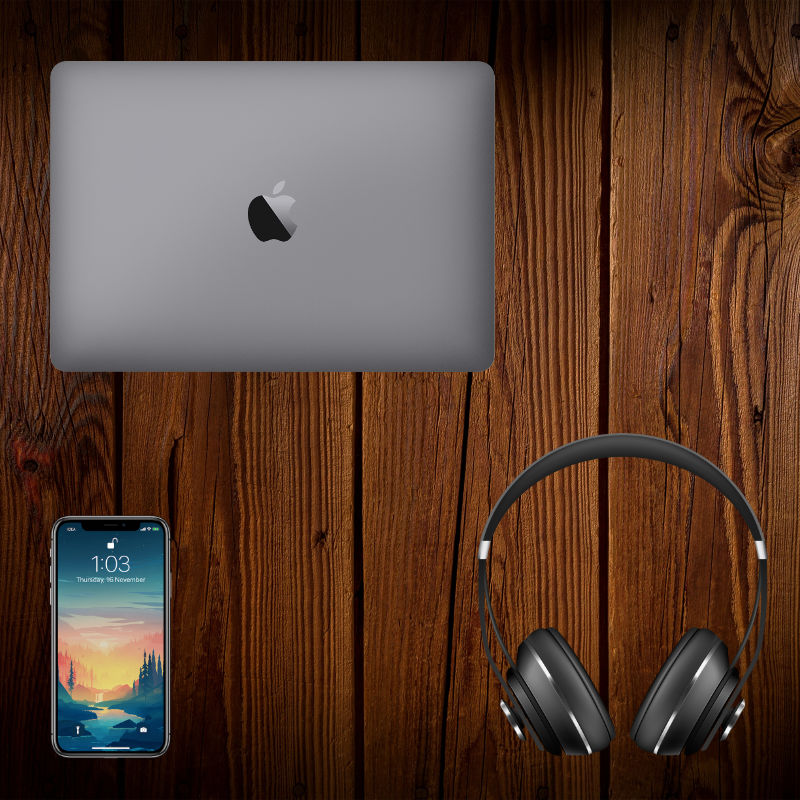
Record With Smartphone (Least Recommended)
What you’ll need:
- Smartphone
- Computer or tablet
In this scenario you’ll be using your smartphone to record both sound and video. We’ll be using the computer/tablet only to display and play back the score with our score player.
Please note that this can only be used as a last resort if you don’t own any audio capture devices. Smartphones are not designed to record good quality audio so we’ll need to either use heavy denoise techniques or use very little of the audio in the final mix.
1. Prepare the Smartphone
Place the smartphone on stable surface (a stack of book or a mini tripod, so that the shot is approx. eye level) and point the camera at you.
Open the Camera App and start experimenting with different framings. The video should clearly show your face (please no cutting the top of the head off) and instrument and, as mentioned above, we prefer eye level shots rather than low camera angles. We recommend shooting video while there is plenty of natural light. Don’t use window as a backlight, position yourself so that the window is in front of you or at a max. 45 degree angle. Use any background you like.
2. Make the Most out of Your Smartphone Video
Please consider watching these short tutorials I made on how to make the best possible video using your smartphone: Making Videos on Your Smartphone (VIDEO) / Making the Most of Smartphone Video (VIDEO)